
|
How do I do my 3000 km Service?
Unless there is a serious issue that needs attention by a shop, Vino owners should learn the few techniques needed to maintain their scoots. There really is no reason to give your bike away for a day and get slapped with a shop fee when you can do this whole job yourself in about 10 minutes. Since this will be the first service for some, this tutorial is designed to help those who don't know much about their bikes to "tune them up" with little fuss. For the beginners, give yourself some credit, breathe deeply and just try each one of these tasks. You'll learn a lot about your bike and keep it on the road. You don't stand to damage anything, just be aware that most of the screws that we are dealing with are threaded into soft metal so you want to get them tight, but don't force them. I find it's best to think of using the same force as turning a water tap tight at your house. Most every screw loosens when turned counter clockwise and tightens when turned clockwise, so set your ratchet to loosen/tighten before you start each task.
Tools & Parts Needed
12mm Ratchet or Box Wrench
A Standard Spark Plug Wrench
A Clean Cloth
A Small Funnel
A Quart of 10W-30 Motor Oil
An Oil pan (margerine container works fine)
A Quart of Two Stroke Oil
A new Spark Plug, if Neccesary.
A new Air Filter if Neccesary.
Procedure
|
|
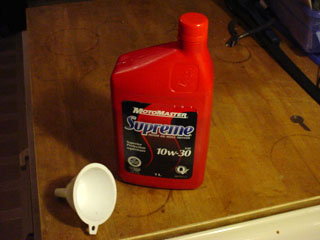
Step 1
This is a picture of the oil and the funnel you will need to do the Final Transmission oil. You can use any brand of motor oil as long as it is 10W-30. It is also importand to have a window on the side of the bottle with a mL (milliliters) grade marked on it.
|
|
|
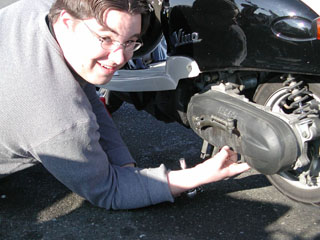
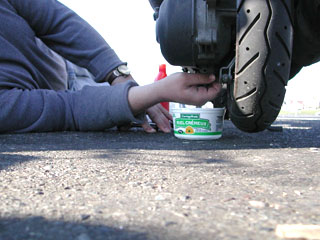
Step 2
There are two screws to drain and fill the oil system on the vino. This oil is *not* the same as the two stroke oil, so under no circumstances should they be confused with one another. The 10W-30 oil is for the transmission gears and two stroke oil is injected into the gasoline before it goes into the topend . The first screw is under the left hand side of the bike.
|
|
|
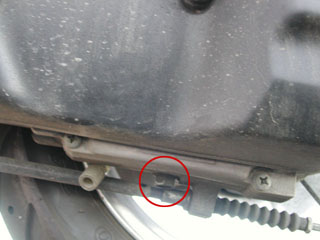
Step 3
Right here, under the engine, is the final transmission drain plug, a 12mm bolt. The final transmission is a small collection of gears that change the gear ratio between the crankshaft and the rear wheel. sort of like the gears on a bicycle.
|
|
|
Step 4
Set the 12mm ratchet to "loosen" (counter clockwise rotation). Then turn the bolt until it finally gives way. It will usually make a small crack sound as it starts to unscrew.
|
|
|
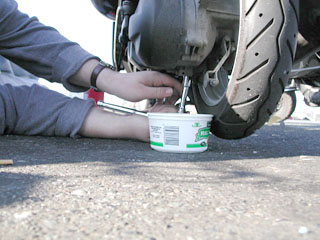
Step 5
After getting the bolt free, position the oil pan under the bolt, and undo the bolt the rest of the way by hand.
|
|
|
Step 6
The oil will now flow freely into the oil pan. So far so good.. you've drained the oil. Once it finishes dripping, replace the drain plug first tightening it by hand and then snugging it down with the ratchet wrench. Go easy on tightening, turn it until it is snug and secure, but avoid using excessive force on nuts and bolts.
|
|
|
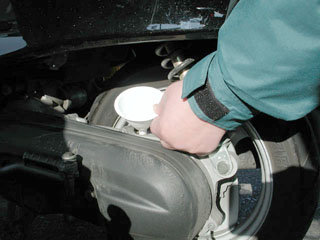
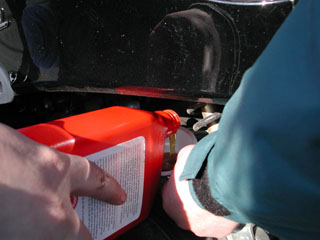
Step 7
I'm pointing at the filler cap. Remove the little plastic cap by turning it counter clockwise. It may be hard at first, but it will loosen off. Put the filler cap somewhere clean (away from dirt and gravel) and pop the small funnel into the filler hole on the motor.
|
|
|
Step 8
Likea So...
|
|
|
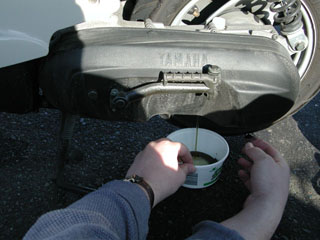
Step 9
Now put in 110mL of 10W-30 motor oil. You don't have to be exact, but get pretty close. The more the better. There is a window on the side of the bottle that tells how much oil you have used. just read it from time to time while filling. If you put too much in, there is a drain on the side of the engine that will spit it out when you start riding, so don't be too worried about it. Replace the filler cap.
|
|
|
Step 10
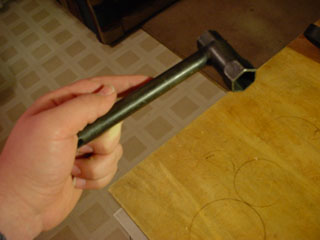
Here is a spark plug wrench in it's native environment. This tool comes in all kinds of shapes and sizes. It works by fitting over top of the ceramic part of the spark plug and turning the 6 sided (hex) rim of the plug. A typical car wrench will work just fine.
|
|
|
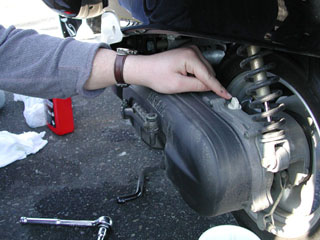
Step 11
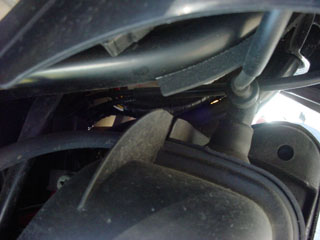
To get at the plug, pull the plug cap off the spark plug. the plug cap is a big rubber coated clip that mates with the top of the spark plug. The plug cap is found by laying down on the fan side of the engine and looking in. it is in the center of this picture. Just grasp it and pull it off.
|
|
|
Step 12
And underneath you'll find the sparkplug. To get the spark plug out the engine, put the sparkplug wrench over top of the white ceramic part and fit the wrench onto the sparkplug. To unscrew it, turn it counter closkwise (or push down) and once it's loose enough, unscrew it by hand.
|
|
|
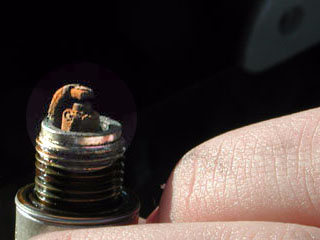
Step 13
Have a look at the sparkplug. It should be chocolate brown, like this picture. If the plug is getting kind of dirty, you have two options: 1. buy a new one or 2. clean off the gunk with a wire brush. Since they're $4.00, I'd just reccomend getting a new one. Shops will need the number off of it, so don't throw it out. Replace the spark plug and tighten it so it's firmly in place.
|
|
|
Step 14
Next on the agenda is the brakes. If you've never adjusted the brakes, I can assure you this is the easiest part of the entire service. Start by guaging the amount of slack in your brake cable. Pull the front and back brake lever and feel how long it takes for mechanical resistance to start. The brakes should just barely engage after about a 1/8" of play.
|
|
|
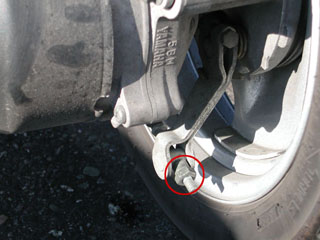
Step 15
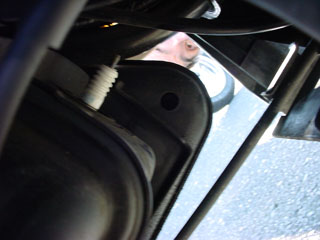
Here is the rear brake adjuster. It is a little screw that you can easily turn by hand. Turning this nut clockwise will tighten the brakes. Naturally, counterclockwise rotation will loosen them.
|
|
|
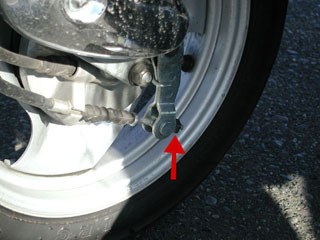
Step 16
This is the front brake screw. Turn it until all the slack is taken up in the brake lever. That's all there is to the brakes on a Vino. To service the actual brake pads (they usually need replacement when they start to grind or squeal), I'd recomend taking the bike into the shop.
|
|
|
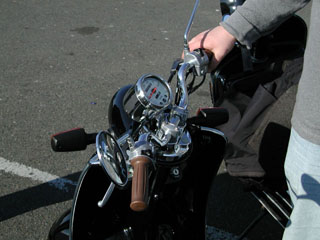
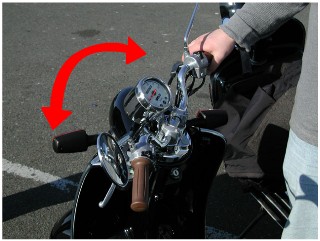
Step 17
The final step is to test your steering column bearings. The test is very simple. While the bike is on its centerstand, have a friend press down on the rear rack. The bike will shift it's weight to the rear tire. Grab the handle bar and turn the bars throughout the entire radius. There should be no clicks or pops and the bars should be totally firm (no joystick movement).
|
That's all there is to it. You're now a master of basic Vino service. If you detect any of that "joystick movement," the ability to move the handle hars in other directions like up and down, or side to side, or you notice that your bike shudders under braking, let the shop have a look at it, because it's a sign your steering column bearings are loose. You often need a special factory tool to change the settings on the steering column, so leave it in capable hands. Additionally, check your tire pressure, check your electrical systems all work okay and adjust your mirrors. This kind of service should be done at 500km intervals if not shorter periods.
Another thing, if you stripped any screws while doing the service, you will have to go to the shop to get the threads fixed. As a precaution, be kind to the nuts. Superman didn't put the bike together, so you don't need to torque down on the engine bolts like him. When it feels tight, it probably is. There are many oil recycling facilities in town for used transmission oil, so seal off the margarine container of oil, clean up all the tools and go for a long, long ride to recycle that old oil.


All Material Copyright 2003 Richard Hoar. Use at your own risk.
|