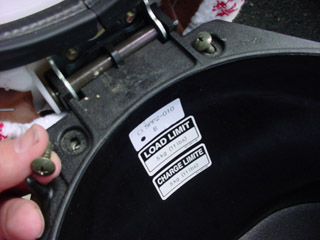
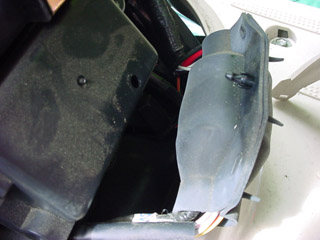
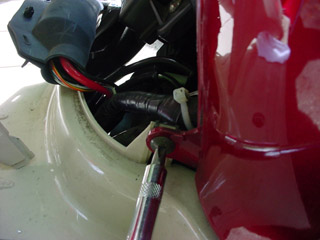
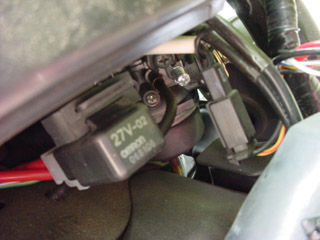
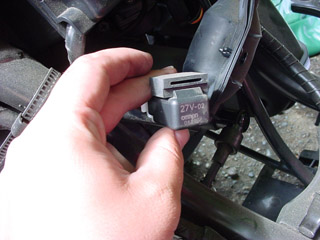
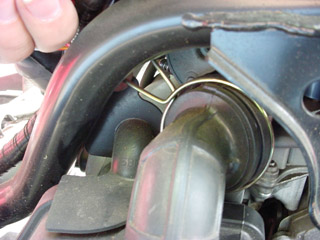
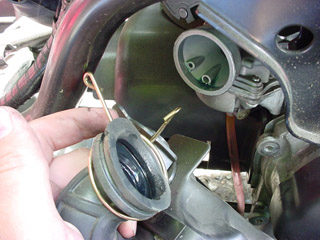
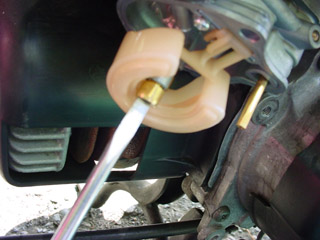
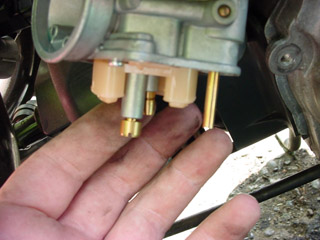
Vino Maintenance Guide


How do I Clean and Jet my Carb?

If you're derestricting your bike it's pretty much guaranteed you'll have to upjet the carb to compensate for the flow. This tutorial will guide you through the steps of getting at the carburettor on the Vino and where to look for jets.

Tools & Parts Needed
10mm Socket Wrench w/ extension
#3 and #2 Philips Screwdriver
A #2 Flat Head Screwdriver
A Standard Spark Plug Wrench
A Clean Cloth
A new Spark Plug if Neccesary.
A new Air Filter if Neccesary.
Air Filter Oil if Neccessary
If you're upjetting for derestriction, pick a main jet 4 numbers higher


Procedure
The Carb Box Step 1

Here's what you're looking at: The Carburettor is on the kickstart side of the Vino. Through the process you'll be thinking, "so close, yet so very far away." In typical Japanese bike fashion, everything has to come off.


The Carb Box Step 2

The first step on the Journey is to take off the belly plate. it's held on by two screws under the seat...


The Carb Box Step 3

and one on the panel itself.


The Carb Box Step 4

Pull the plate away and put it somewhere safe. Underneath the plate are a collection of wires and the battery compartment.


Cleaning the Air Filter Step 5

Undo the two air filter box bolts located near the kickstart.


Inspecting the Fuel Filter Step 6

Unhook the wire junction box by turning a screwdriver in the plastic screw, it will pull away and make it easier to get the floorboards off.


Time to buy a new filter when... Step 7

Undo this one...


Getting the float apart Step 8

and this one


Damaged Float and Needle Step 9

Pull the little plastic cover off this one..


Slow Running Jet Step 10

and unscrew it...


Main Jet Step 11

Then remove this one, and pull away the panel. Repeat the same procedure for the engine oil side panel. Yes, they both have to come off.


Starter Jet Step 12

Once you have both cowls removed, undo the four 10mm bolts on the floorboards.


The Slide Step 13

The floorboard pulls away from the headset and toward the seat. once the floorboard is out of the way, you'll have pretty good access to the carb and motor components.


The Throttle Rod Seal Step 14

The connector beside the relay box is the autochoke connector and you have to remove it so it doesn't get damaged. Just press down on the top of the connector and pull it apart.


The Choke Step 15

Looking right below the wiring junction box, there's a relay. The relay will get in the way of unscrewing the carb clamp. Just pull the relay towards you, and it will slip off it's mount.


The LS Oil Metering Device Step 16

Now you'll have to get the air filter box off the carb. To do that, squeeze the little ring together and push it onto the air box hose.


Inside the pump Step 17

With the clip slid back, you can pull the lip of the hose off and expose the carburettor's throat.


Inside the pump Step 18

Just a reminder to make sure you disconnected the choke wiring.


Inside the pump Step 19

Now you need to unscrew this screw. it has a lot of turns and it holds the carb to the motor. loosen it and pull the carb free from the motor.. it may take some persuasion (wiggling, swearing, pulling, lots of swearing).


Inside the pump Step 20

now the carb is free, you have to pull off the float bowl. to do that, undo the two screws on the bottom of the carb body. If you don't like being covered in gas, I would suggest using some gloves for this process..


Inside the pump Step 21

This is the float bowl.. it's like a gas reservoir, so no matter how you ride, the gas won't cut out on you. as you can see, it stores a quantity of gas, which you should probably dump out. this bowl should not have any contaminants in it.. if it does, you may want to replace the fuel filter.


Inside the pump Step 22

The main jet, the one you have to replace is on the bottom of the carb and unscrews with a flat head screwdriver.


Inside the pump Step 23

My jet was a 64. I found that 4 steps bigger worked best. I chose a 68 Jet and popped it in. This jet will only affect the mixture at high revs and has very little effect at low revs.


Inside the pump Step 24

Here's another shot of the inside of the carb.


Inside the pump Step 25

The air box is easiest to work on while it's not connected to the carb. it is held together with 3 philips head screws.


Inside the pump Step 26

Under the cover is the filter element, a piece of foam, lubricated with filter oil. If the element is dirty (discolored), replace the element or clean it in carb cleaner (or gas if you don't mind the smell). buy some filter oil from a bike shop to keep the filter from tearing, inducing water, or getting really dirty.


Inside the pump Step 27

The element just pulls away by hand. there's no stiffener like in a car filter.


Inside the pump Step 28

Put everything back together as far as step 14. Start the bike and take it for a 3 minute ride to warm it up. Bring it home and park it, but don't turn it off. If it doesn't idle fast enough (stalls), turn the idle set screw clockwise to increase the speed. Once you get a reliable idle, put the body panels back on and ride away for that beverage that you deserve.


And that's the Vino carburettor bit..

back to top previous page


All Material Copyright 2003 Richard Hoar. Use at your own risk.