Vespa Maintenance Guide


Front End Work

The following tutorial deals with most of the facets of the front end of the bike; that is, the headset, forks, front hub, front brakes and front suspension system. This guide will help with problems as small as getting into the headset, to problems as large as dropping the forks out. Most of it is easy and requires few tools; it's mostly about the order of disassembly that is important.

Tools & Parts Needed
Socket Set (7-22mm)
Spanner Wrench set (7-22mm)
Small Screwdriver for the Front Hub Nut
Long Handled Screwdriver Set (#1,2,3 Philips and #2 flat head)
Spark Plug Wrench
Disposable Shop Towels
Rubber Face Mallet
A Metal Hammer
A number of pairs of Visegrips
Needlenose pliers
A set of circlip pliers
A Large Chisel (see below)
Various bearing extractors and punches(if necessary)
Bearing Grease (lithium grease)
Some milk crates to set the bike on
A strap wrench


Procedure

Remove the Ground lead from the battery to isolate the battery. There is a good chance that the fuse will be blown after the procedure if you leave it connected.


Unscrew the four headset top screws using a number 2 philips. store them somewhere safe.


With the retaining screws removed, push the large speedometer cable near the wheel into the fork. This will cause the headset to pop up.


The headset cover should look like this once you have pushed on the cable.


Keep pushing the cable until you can get it pretty much wide open. There will still be a bit of resistance because of the speedometer cable.


Wrap a piece of duct tape around the metal skirt of the speedo cable. this will help the nut that hold the speedometer cable to the speedometer housing stop from falling down the fork tube. Once the tape is in place, unscrew the speedometer cable nut by hand until it is no longer connected to the speedometer housing.


Now the headset cover will be held on by only electrical wiring.


Instead of removing the wires from their terminals, simply unscrew the ignition switch retainer nut. This will make the switch pop right out of the cover.


Here is a shot of the handlebars of the P200. The two pulleys hold the throttle and gear cables. The headlight is fully accessible from here.


Pull the highbeam, speedometer and turn signal lights out of their housings to fully release the headset cover. if you wish to paint the headset cover, the speedometer is held in by a nut on the bottom and a metal reinforcing plate. the indicator light housings have small clasps on the side that you simply press inward to remove.


If you intend to remove the forks, you will have to disconnect the front brake cable. In order to do that, you must unscrew the 11mm nut on the brake linkage, next to the front hub. the cable is often very frayed and rusty, so just pull on it like crazy until it comes out of the bolt. place the nut and bolt somewhere safe.


The front brake lever will go limp. So all you need to do is unscrew the lever, pull the lever and its washers away and then pull the inner cable clear of the bike. depending on how frayed the old cable is, this will fairly easy. Use visegrips to pull the cable if it gets too hard to do by hand.


Pictured here is the front brake switch. Not all Vespas have these, but they are very simple switches. The switch is just a pressure plate. as the pressure gets high enough, the switch connects the circuit. Most of the time, cable kits will not have an outer cable for this purpose, so keep the old front brake outer cable so you can measure where to cut the new one.


From here on, we are going to be dropping the forks and having a look at the hub and suspension section. First we need to get the bike on blocks. Put a milk crate directly beneath the bike so it is stable. then take the headset off. To do this, get a 13 mm ratchet and unscrew the headset pinch bolt.


Collect the square washer from the pinchbolt on the opposite side.


Now you can pull up on the headset and bend it towards the seat. all the cables are really elastic and will oblige, so don't worry about breaking anything. Just make sure the electrical cables don't snag on anything.


Directly beneath the headset is a collection of strange looking nuts holding on the forks. remove them by using a large jaw set of visegrips or a bicycle "c" wrench. They are normal right hand threads, so just unscrew them as you would any other screw. The top one is a lockwasher. It holds the bearing race tight.


below the lockwasher is a normal spacer washer. it has a tooth that fits into the threads of the fork. Below that is the bearing race. the tightness of the bearing race will determine how well the forks operate. When reassembling the bike, make sure to take up all the slack in the bearing, but refrain from over tightening it -- more instructions on this to follow below.


Here's where work gets too hard to photograph! :). once the bearing race is removed, the forks will move up and down. You have to get a friend to pull the bike upwards, while you pull the fork out of the frame. make sure to take the small bearing on the top and the big roller bearing on the bottom off of the fork. They don't like being dirty.


Now undo the four screws that hold the mudguard onto the fork. On P200's the mudguard is very easy to remove, just maneuver it around the fork stop and set it aside. On older Vespas you have to remove the lower bearing race and dust guard -- the part covered in white grease here -- before you can get the mudguard off.


To get the cursed, ugly-ass reflectors off the bike, undo the speed washers on the inside of the mudguard. usually these are easiest removed with a sharp pair of wire cutters. The same goes for the ugly hood ornament.


Here's the fork with the lower bearing race cleaned up for new grease. at this point you should send your mudguard to the paint shop if needs be.


let's move on to the suspension. The P200 has an all in one spring/damper unit. you can make the stock shocks look real purdy if you take the grey plastic thing off, that is, if the shock isn't blown. The easiest way to diagnose a blown shock is that it will go "clack" when you pull up on the bars, or it will ride like a pogo stick. to get the suspension off the bike undo these two nuts...


...and these two...


now you're looking at the top of the shock. The top nut holds it all together. That's what we need to remove.


Get a strap wrench and wrap it around the outside of the top part of the shock. then get a 17mm wrench and unscrew the top nut. once the nut is removed, the shock part will fall out of its holder.


Now to get the grey thing off, use a flat head screwdriver and turn the top of the shock counter clockwise. the rod will slowly recede into the metal block and release the top part of the shock. you will then get the top part of the grey plastic boot off.


The spring comes out next. you may want to powdercoat or plate this part to make your bike look better. The grey thing was just to stop the elements from rusting out the spring.


Look ma! more plastic! The rubber bumper stops the shock from bottoming out. The black sleeve spaces the spring so that it can't move around. the grey thing is just there to be ugly.


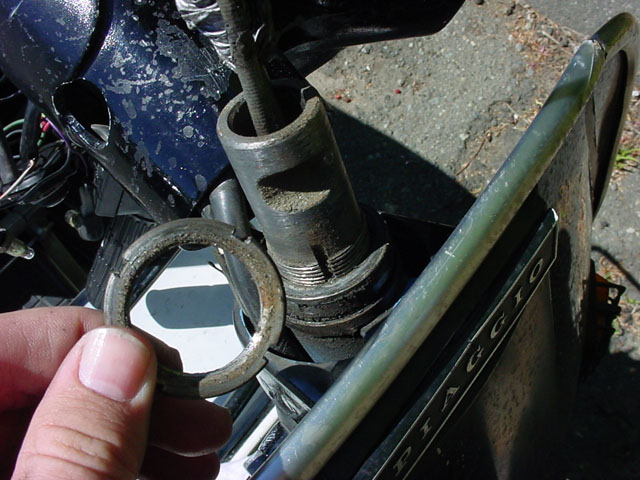
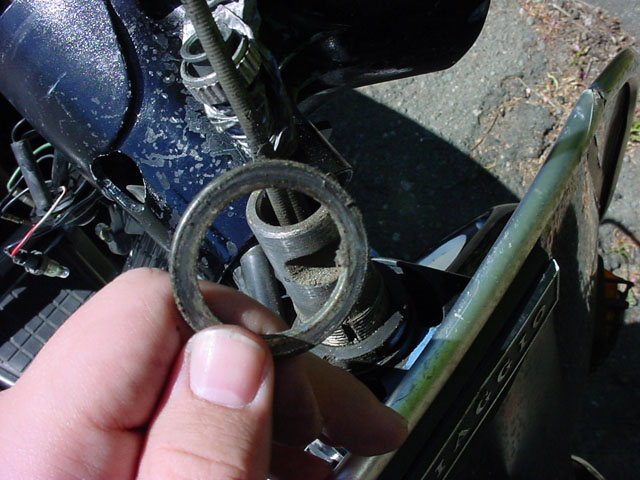
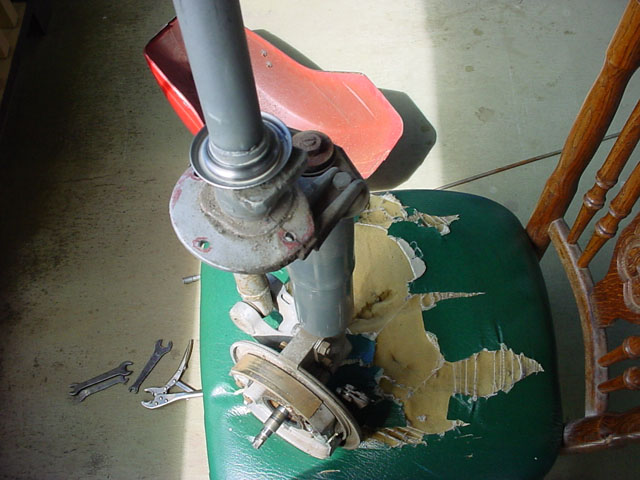
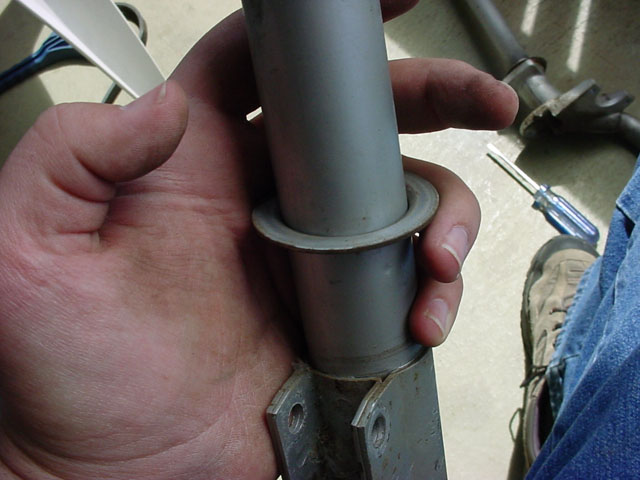
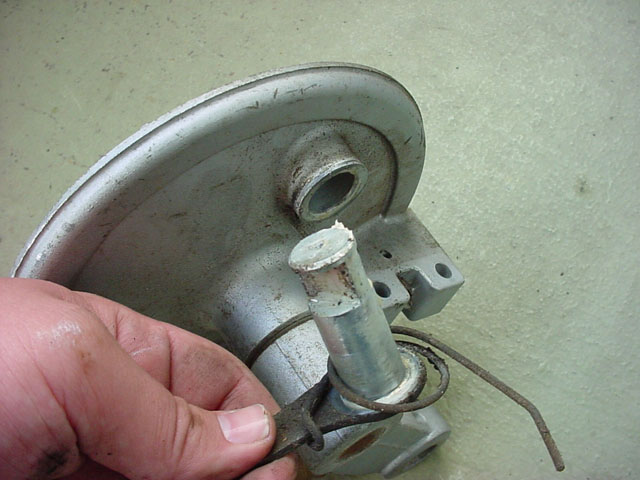
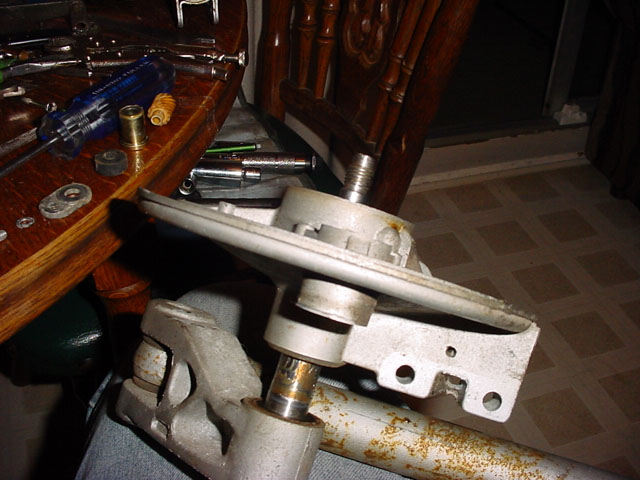
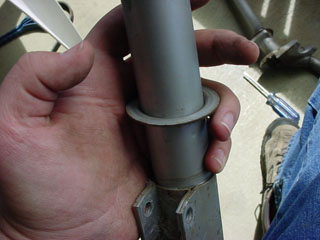
The bottom flared metal piece holds the spring. Unfortunately, once the damper unit dies, it's not rebuildable like on older Vespas, so you kind of have to replace the shock once it leaks. Kind of a shame, really, but I can't say enough good about the Sebacs I went with as replacements.


Now let's take off the hub and see all the goodies underneath it. Start by tapping a #0 Flat head screwdriver into the indent under the hub's jesus nut. this will straighten out the hub nut so you can unscrew it.


Since the nut is on a fixed piece of metal, it won't be much of a wrestling match to unscrew it. Use a 19mm wrench and remove the bolt. Put it aside. Underneath will be one of the two wheel bearings. It's a 6201 sealed roller bearing.


Since there's a couple of bearings to get off, you should gently tap the hub off with a rubber mallet. Underneath the hub is a seemingly threaded portion. it is the part that drives the speedometer gear.


First thing to do is remove the brakes. This is always a fun task, as is anything involving a really strong spring. remove the clips of the old brakes and hold a towel over them as you do it (they fly far away). Then lever the brakes up and over the operating cam. they will collapse and you'll be good to go. put them back on the same way, but opposite, later.


When you remove them, the cam will fall out of the hub back plate...


Collect the pieces: the brake cam and the return spring shown.


Remove the old seal from the outside lip and clean up the earwax grease.. blech.


Flip the forks over to reveal the speedo drive area..


undo the speedo cable securing plate and all these parts should be there. if it has been a while since rebuilding the forks, order a new speedo drive gear.


Remove the center circlip to begin releasing the back plate. Pull the back plate up and away from the axle once the circlip is off.


Check that the seals and bearings are sound. If they feel rough or if the backplate made noise when shaken, replace the needle roller bearings inside and the seal on the outside.


Here is the seal in question.. it should not be hard as a rock or torn.


This is a shim washer.. it is important to make sure this part is pretty much flat.


This is another shim washer.. this one lets the backplate move freely without the seal digging into the fork linkage. It should lay flat too.


Here's what I did to that red mudguard in the meantime.


Okay.. so now you just put the suspension and hub stuff back together the way you found it.. just follow the steps backwards. It is probably a good idea to put new brake shoes in everytime you rebuild the front end. Pack any bearing with lots and lots of bearing grease. Since the original hub nuts can be a bit scarce, you only end up getting about 3 attempts at removing the hub nut before you'll have to replace it.. so make every repair count. The needle roller bearings are kind of hard to remove without destroying them, so be sure to have the right replacements before doing the job. The hub nut can be re-dented using a large cold chisel and a metal hammer. Before you reinstall the fork, you'll probably want to run some new cables through it. Here is a bulletproof way to install an outer cable the quick and painless way.. this works for any part of the bike, not just the forks. peep dis:


You take a roll of 70lb braided picture hanging wire, and fish through the hard to reach area in question from the bottom up. you push it all the way through until it peeks its head out the top of the fork column. Next you pull out the picture wire, really long like. and thread it into the new outer cable housing you want to install. Once it's through the cable housing, tie a good solid knot in the picture wire at the end exiting the new cable housing. When it is secure, guide the outer cable home by pulling on the picture wire and pushing on the outer cable. It will usually slip right into place, but if it gets snagged up, just reverse the course and try it again. Often the cable will just hang up on the place whee it exits the fork, so just jostle the picture wire at the exiting end until it pops through.

Once the new cables are in, put the bearing on the lower fork race and grease it with a liberal amount of bearing grease. Next, feed the fork tube into the frame. When the top emerges through the hole in the frame, put the small bearing on the race with lots of grease to help it roll. Then put the top bearing race on and cinch it up tight. now here's the critical part: you want to make the fork tight in the bearings, but not so tight that it's crushing the bearings. The easiest way to tell you have it right is that there will be no slack in the fork tube (won't wiggle up and down), and once it's that far then you tighten the race until it's just tight enough so that you can sweep the forks back and forth with no resistance. Once it's set, place the washer on top of the bearing race. Then turn the lockwasher down until it starts to apply pressure on the lockwasher. Get a set of wide jaw visegrips and just let that lockwasher have it. Tighten it as hard as you can, it should be the same tightness at the rear hub :).

Once it's all kosher, just pop all the headset stuff back together, and make sure that if you have an in-line front brake switch that you cut the brake line the correct length, so that the switch sits in the right position. Insert the new speedometer cable last, and make sure the little washer under the cable header is present, otherwise you'll get a goofy and pulsing reading on your speedometer. Reattach the brake cable and cinch it up to just where the brakes engage with the slack adjuster on the hub. You know the brakes are good when you can just barely press the lever all the way to the bar. Take it for a spin and pay close attention to anything funny or any clunking at braking. Weird noises can often be caused by loose steering column bearings. Feel out the braking and tighten as necessary using the slack adjuster.

back to top previous page

All Material Copyright 2001-2024 by Richard Hoar. Use at your own risk.