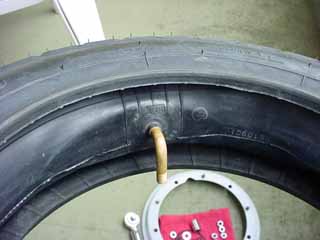
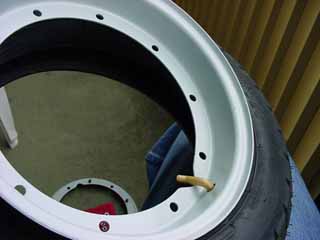
Vespa Maintenance Guide


Spare Tire Assembly

This project was attempted purely for the sake of having a spare tire. It turned out to be an amazingly simple task, despite the wait times for parts. This article will also help people who are stuck with flat tires and are looking to replace them. For this project you will need only a few tools and little bit of patience. The hardest part of this project will be researching what tires to use. I chose IRC MB520's -- my brother chose Continental Zippy 1's. Mad props go to mobboss on Scooterbbs for the help with the tricks of the trade!

Tools & Parts Needed
10" Split Rim Set
Inner Tube
3.50" X 10.00" tire (your choice)
8mm metric nuts (as many as you like, you NEED 7 though)
Ratchet Set (Torque wrench reccomended)
Hand or Foot Pump


Procedure
The tools Step 1

Here is a quick look at some of the tools needed to start this project. The pump is not shown. A small hand pump from a bike shop will be fine, just have a gas station nearby to finish the job.


Inner tube Step 2

Unroll the inner tube and make sure that the filler tube is crooked like the one in the photo. If it is straight, purchase the correct tube.


Filler up Step 3

Take the pump and fill the inner tire until it is expanded around the whole tube. This will aid in seating the tube inside the tire shell.


push it in and spread it around Step 4

Push the inner tube into the shell and align the filler tube with a mark that exists on both sides to the tire. This will make it easier to align the split rims later.


Filler tube Step 5

Set the rim into the tire noting that the filler tube points toward the opposite side as shown. Align the filler hole in the rim with the mark you found earlier.


Alignment Step 6

Here you can see the alignment marks I used. The filler tube and hole in the rim are aligned to a small divot on the tire. As you can see, it exists on both sides of the wheel. This is important because you have to align the screw holes later in the assembly.


setting the rims Step 7

Now madly squash the rim together and get a bolt on each of the studs. Once you have it to this point, you have to start tightening the nuts. It's not overly important that the filler tube neck is seated properly.


Tighten evenly Step 8

Tighten the rim using a torque wrench and extension. Tighten the nuts to the same specification as the cylinder head. Also tighten alternating screws to make the inner tube compress evenly. You may have to use the blunt edge of a butter knife to push the tube away from the seam.


watch the bead remains even Step 9

Now fill the tire extremely slowly to 45 PSI and no more. The bead, the line around the tire should be evenly spaced from the rim at all points. If it isn't even, start again. If the bead is even, decrease the pressure to 30 PSI and mount it to the spare tire holder on the battery side of the bike using two more 8mm nuts.


back to top previous page

All Material Copyright 2001-2024 by Richard Hoar. Use at your own risk.