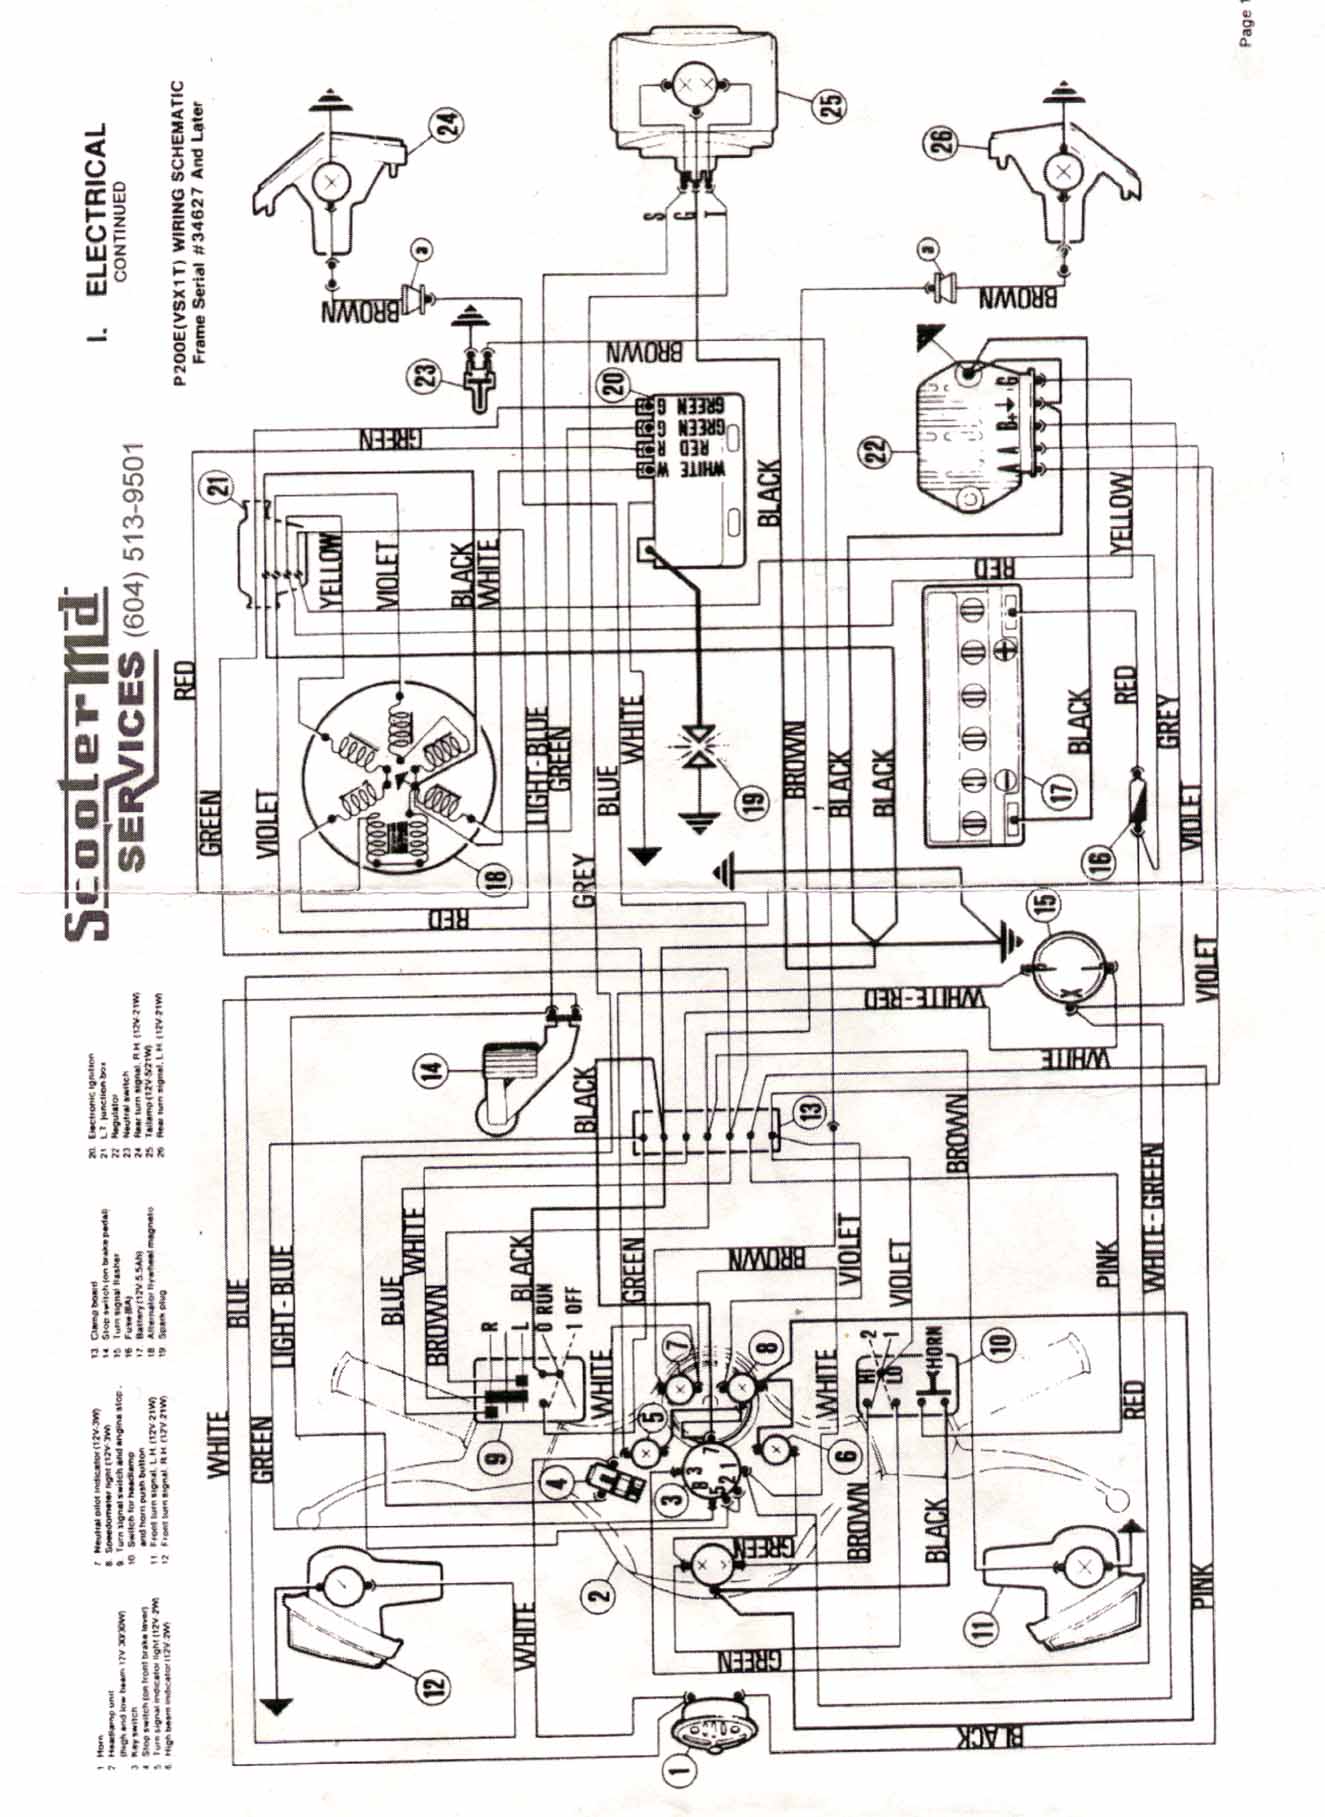
Wiring Diagrams The wiring structure on the P200 is dependant on the presence of a battery. The best way to identify the diagram that works for you is to have a look at the voltage regulator (under the spare tire side cowl). The difference between these regulators is that one has an AC regulator in it and the other has an AC regulator AND a diode protected output(labelled B+). If there are only 3 terminals, use diagram 1; if there are 5, use diagram 2. There are rogue wiring looms out there that won't look like these diagrams. If you have one like this, document everything you do to the wiring and make notes of problematic areas. If you are buying a new scoot, ask the owner if they have changed the wiring harness. If they have, ask them for a diagram. If you have any other diagrams please email me and send me a scan, I will put it up ASAP! If you want to trace out wires quickly on the second diagram, check out the interactive wiring diagram below (you will need the flash 5 plugin) Printer-Friendly Wiring Harness Schematics 3 Terminal Voltage Regulator (Batteryless) 5 terminal Voltage Regulator (Battery) Interactive Diagram - 5 Pole Regulator To get a close look at the the connections, click the right mouse button and click "zoom in". This diagram is a trace from the second diagram (5 pole voltage regulator). 
All Material Copyright 2001-2025 by Richard Hoar. Use at your own risk. |