|
|
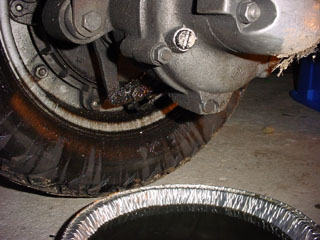
Undo the oil drain plug screw with a spanner and allow oil to drain out of the bike.
There is not much oil in the gearbox, so a 10" pieplate should sufficiently hold the oil.
Drain the oil into a 4L juice bottle using a funnel and take it to the nearest recycling station when it
gets full.
|
|
|
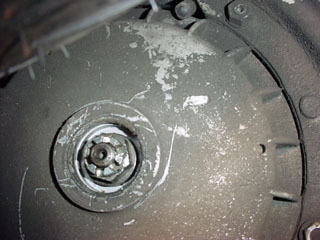
Remove the rear hub dust cover and pull the cotter pin out of the large castle nut.
Using a 22mm socket, loosen the Hub nut. If the nut doesn't come loose, try a breaker bar
or extend your socket using a piece of pipe over the handle.
|
|
|
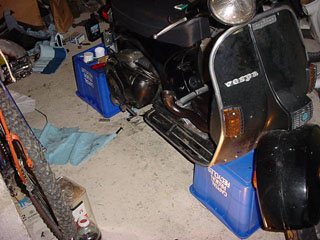
With the hub loosened, place the bike on secure crates for the rest of the procedure.
|
|
|
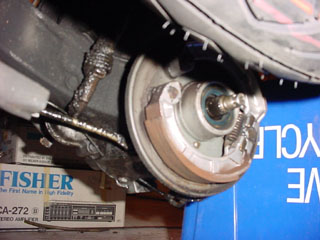
Once the bike is secure, remove the hub nut and washer and pull the wheel away from the bike.
You may want to put a bag around the brake pads in case oil happens to spill from the motor. Make
sure to lay some paper or oil absorbent material beneath the motor during this procedure.
|
|
|
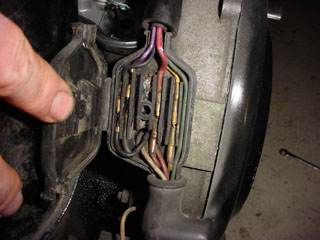
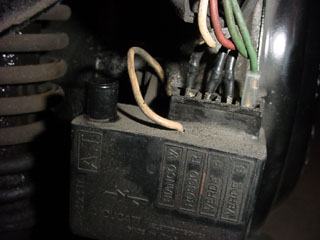
Open the junction box and disconnect all of the wires inside, while noting color matching. There is one green wire that travels past
the junction box into the ignition box below.
|
|
|
Disconnect all of the wires to the ignition box and pull the Spark plug cap off of the plug.
Make sure to keep track of all the rubber bits and if they are excessively worn, replace them.
|
|
|
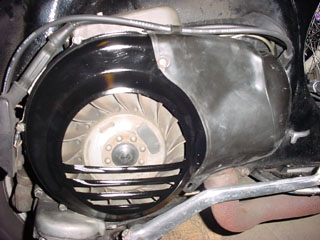
Unscrew all of the engine and fan shroud screws and pull them off of the engine. Carefully unhook any of the electrical
cables attached to them.
|
|
|
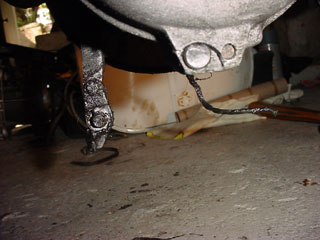
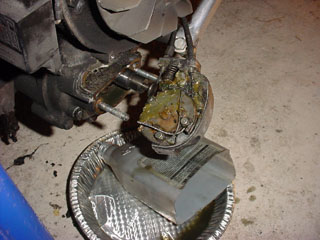
Disconnect the rear brake cable by unscrewing the harness on the actuator arm of the brake. you will likely need a socket
to do this.
|
|
|
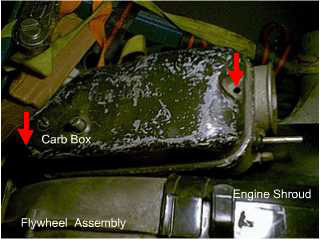
Remove the two 11mm nuts that retain the gear selector box. Use the handlebar to "shift" to 4th gear and just a little
beyond. the selector box will pop off. take care not to damage the gasket beneath the box otherwise you will have to add
it to your parts list.
|
|
|
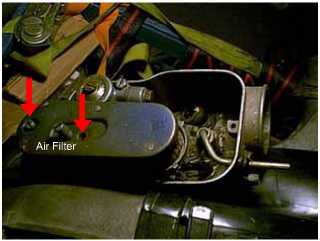
Remove the carburetor air box top by removing the two arrowed screws.
|
|
|
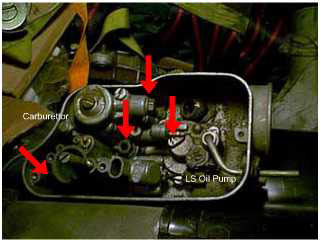
Remove the air filter by removing the two arrowed screws.
|
|
|
Unhook the choke cable (the thin wire in the center of the carb) from the choke lever. Unscrew the gas line union nut
using a 10mm socket. Loosen any hose clamps that may be applied to hold the line to the union banjo and pull the banjo shaped union
out of the fuel line. Loosen the two 11mm bolts that hold the carb to the engine using a deep socket or extended wrench. Take care
not to lose fasteners in the carburetor. If you have an injected model, do not mess with the injector unless it has stopped working.
Once everything is loose, pull the carburetor body straight up and out of the air box.
|
|
|
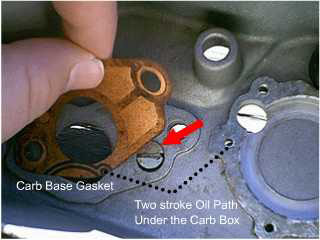
Underneath the carb to air box gasket is a flat head screw that holds the carb box to the motor.
simply unscrew the screw to detach the air box. Once that's off, pull the injector gear (if applicable)
from the motor. The gear should be clean and free of scratches.
|
|
|
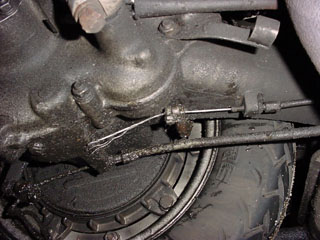
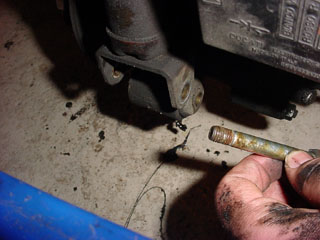
Remove the cable nipple that holds the clutch cable on. Pull both the clutch cable and rear brake cable free from their
respective slack adjusters.
|
|
|
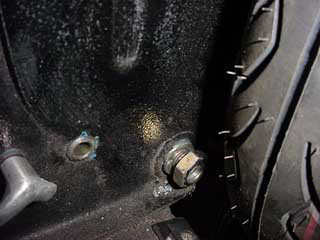
Remove the rear shock bolt and put it aside. The engine may drop a bit, so take precautions to make sure the bike
is stable.
|
|
|
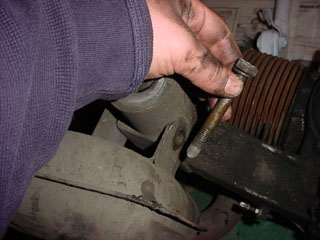
Clamp a pair of Visegrips to the bolt head of the engine mounting bolt and allow them to catch on some part of the frame. Using a 22mm socket,
loosen the nut on the main engine bolt. Once it is loose, collect the nut and lockwasher and bang the bolt through
with a hammer and a drift. Be prepared to catch the motor if it falls.
|
|
|
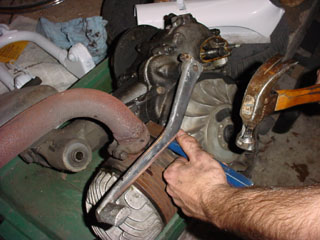
Undo the 17mm Exhaust box bolt. collect the lockwasher and bolt and put them aside.
|
|
|
Loosen the exhaust clamp and see if you can wiggle the exhaust off the exhaust stub. If you can't budge it (which is often the case),
take a large chisel to the side and lever it off with a few sharp blows with a hammer.
|
|
|
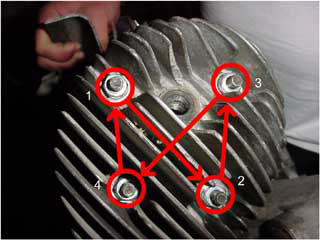
Now remove the cylinder head. Loosen all the bolts a 1/4 turn at a time in the following order. The head is quit soft metal
and easy to warp, so take your time and loosen the nuts properly. Unscrew the sparkplug once you're done getting the cylinder nuts and
washers off. Finally, Pull the head off.
|
|
|
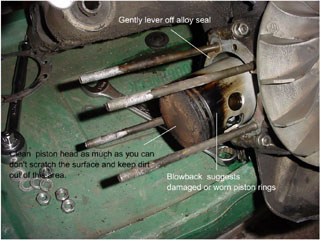
Next, pull the cylinder off of the studs and place it aside. Use a smear of oil on the cylinder wall to prohibit rust.
gently pry the alloy seal off of the engine case.
|
|
|
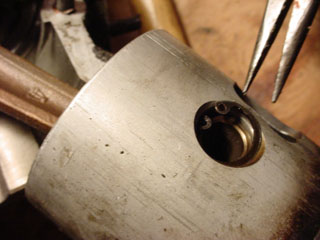
Remove the two piston circlips and put them aside.
|
|
|
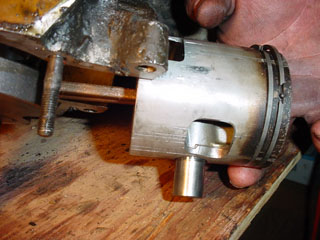
Drive the gudgeon pin through the piston using a clean 3/8" socket extension or a gudgeon pin extractor tool.
Remove the piston and the small end bearing. note: you can
see a piston ring locator pin in the center of the ring gap.
|
|
|
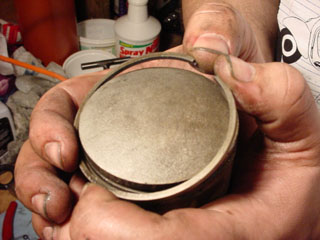
Push the piston rings apart with your thumbs and push them over top of the crown. They will come off.
Inspect the piston for scuff marks and make sure the pin locators are in position.
|
|
|
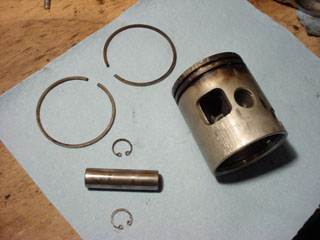
Here are most of the parts of the piston assembly. The only thing not show in the picture is the small end
caged bearing. Note how scratched up the piston skirt is. It would be wise to replace a piston that is that scuffed
up. If your piston looks like this, you will have to oversize your cylinder and use a new oversized piston.
|
|
|
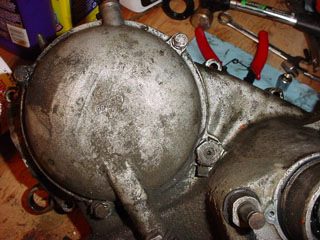
Let us now move to the clutch. To get at the clutch you will need
to remove the clutch cover. There are 3 10mm bolts around the clutch cover and another
large 17mm bolt to the right. Leave the 17mm bolt alone for now, as it holds in part of the gearing.
|
|
|
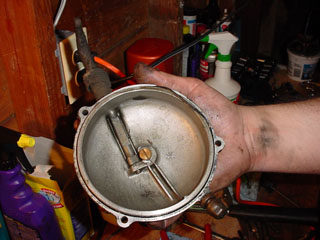
This is a shot of the inside of the clutch cover. this assembly consists of a few seals and an arm that puts pressure on the clutch.
The part to watch for is the little brass push out bearing in the center of the cover assembly. It can drop out and into the
motor.
|
|
|
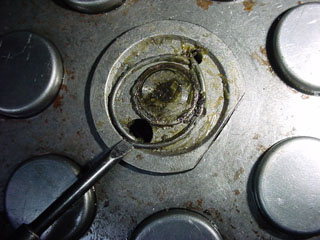
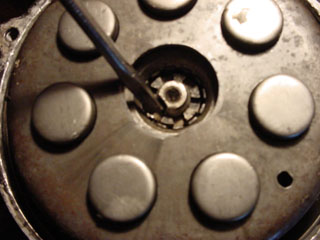
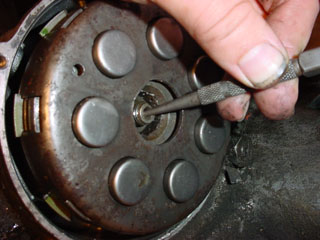
To remove the clutch, you must first take off the pressure plate. There is a little piece of wire holding in the plate. All you have to
do is push the wire towards the center with a screwdriver and the plate will relase. NEVER BEND THE WIRE!
|
|
|
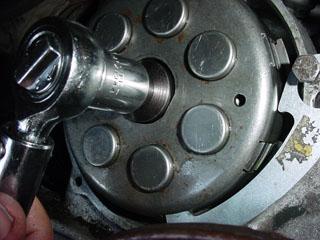
Underneath the pressure plate you'll find the nut that holds the clutch onto the crank. You'll have to pry back the little
teeth on the lockwasher in order to loosen the clutch.
|
|
|
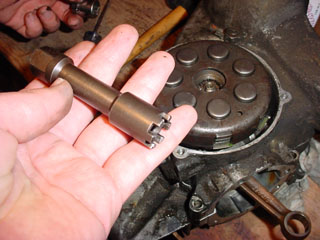
This is a clutch nut removal tool, a specialized tool for Vespas. You need to buy this tool in order to remove the clutch.
There are other ways of getting it off, but we couldn't get them to work.
|
|
|
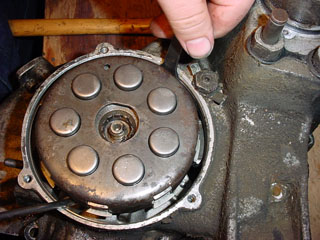
You will also need a clutch holding tool. This is the way to do it right. it saves a lot of grief over doing it other ways
and preserves the clutch nut teeth much better. If you are hard up for time, put a round tool through the small end of the connecting
rod. with the apparatus in place, undo the clutch center nut.
|
|
|
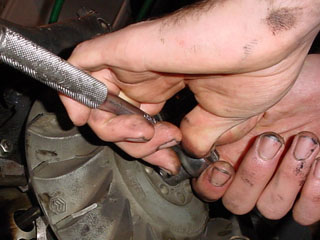
Often the clutch will be loose enough so it will come off when it is levered with two screwdrivers. The crankshaft is not tapered
so it shouldn't be a wrestling match. However, the woodruff keys sometimes get sheared, making it extremely difficult to remove
If you can't get it out now we'll deal with it later in the process. Otherwise pull it out and remove the woodruff key.
|
|
|
Before unscrewing the nut on the flywheel, you will have to lock the flywheel. This is the hard part to do right.
Generally I lock the crankshaft by sticking a round tool through the small end of the conrod. You could also put a tool between the flywheel fins
or buy a rare flywheel holder tool. Once it's locked, pull the dust cover from the flywheel and unscrew the nut underneath.
|
|
|
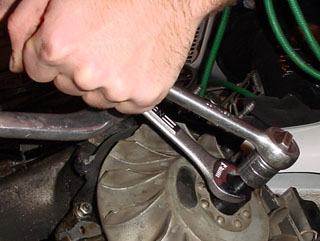
Take the special flywheel pulling tool and thread it about 5 or 6 good turns into the flywheel. Then, using two wrenches, slowly turn
the center of the tool tighter and hold the outside of the tool steady. Eventually the flywheel will release from the crank and pull away.
|
|
|
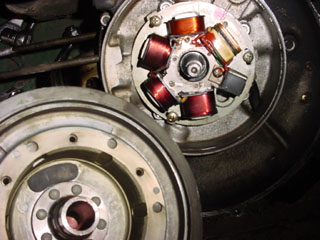
Underneath the flywheel is the stator, the electrical generator for your bike. Make sure everything is nice and
clean. If you see ratty wires or anything like that, it might be a good idea to replace them. Keep this part of
the motor super clean. Remove the woodruff key from the crank taper.
|
|
|
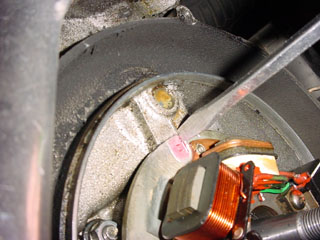
Mark your default timing point by hitting a flat head screwdriver on the case and stator. Careful about using felt markers as
gasoline will erase your timing mark and you'll have to re-time the engine.
|
|
|
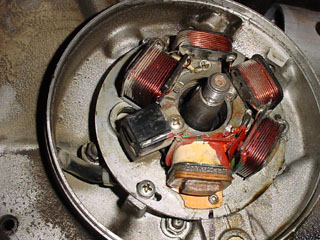
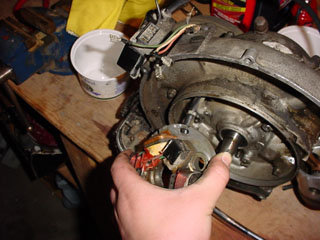
Undo the three Philips head screws that hold the stator plate to the motor. The stator will then dangle free.
|
|
|
Pull the stator free of the motor and place it somewhere safe. if it needs electrical repairs or wire replacement, do that while
you wait for new parts. :)
|
|
|
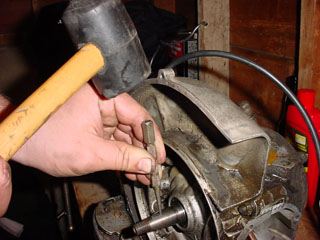
Sometimes the woodruff keys can be a bitch to get out. this method usually works well. get a small metal punch and position it on the
rear of the woodruff key. hit it with a hammer and it will slide forward and eventually pop out. It won't hurt your keyway either! Bonus!
|
|
|
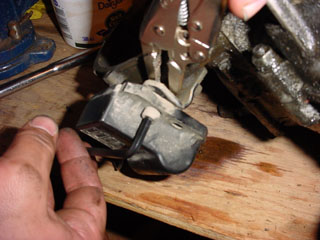
Remove the ignition box from the motor. Almost every motor has a different mounting scheme, so just roll with it :)
|
|
|
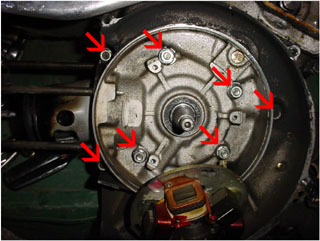
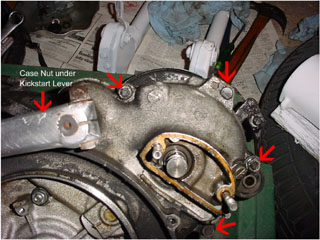
Remove the arrowed bolts. We're about to crack the cases.
|
|
|
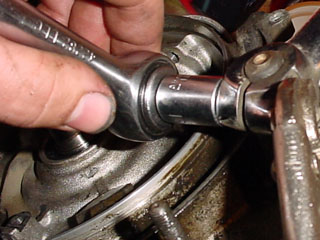
Remove the arrowed bolts. Can't you feel the excitement?!
|
|
|
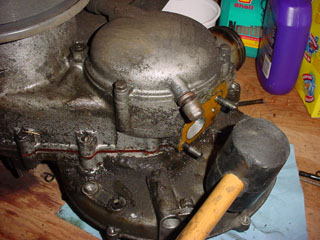
Undo the kickstart lever.
|
|
|
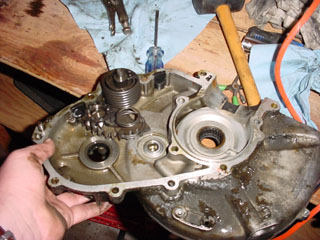
Take a rubber hammer and whack the case a few times while holding the motor flywheel side down.
The cases will just peel right apart.
|
|
|
This is the flywheel side of the case. Collect the kickstart gear and the kickstart spring (they're sitting on the kickstart gear in the picture).
|
|
|
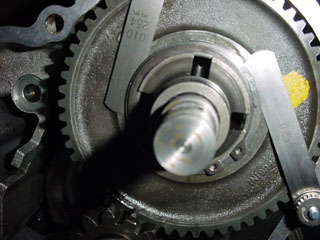
Put the flywheel side case aside for now and move to the gears. Check the gearbox float with a feeler gauge.
Stick another set of feeler gauges under the opposite side of the measurement point to balance the reading.
the float should be 0.15-0.40mm (0.50mm is the extreme limit). If it goes beyond that, you have to buy a bigger gearbox shim. Use your math to get the float
down to about 0.30mm float and oversize accordingly.
|
|
|
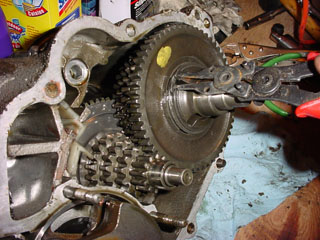
Remove the gear retainer circlip.
|
|
|
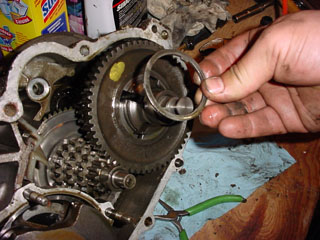
This is the gearbox shim. If you found your float measurements were out of spec, this is the part you will
have to oversize. This part hold the gears tight together so they cant rock on the output shaft. If you leave
a bad condition, you may cause rapid wear to your gearbox.
|
|
|
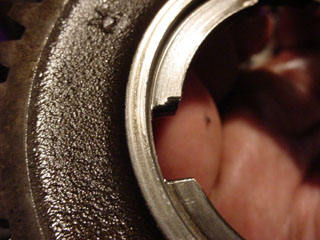
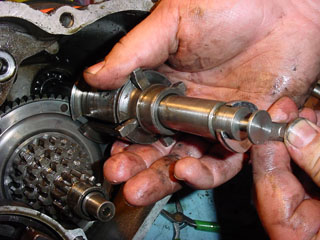
Remove the gears one by one and mark the side facing out with a grease pencil for easy reassembly.
Look for extreme wear such as this on the notches. A gear this badly chipped should be
replaced, because it will cause quick wear on the shift cross.
|
|
|
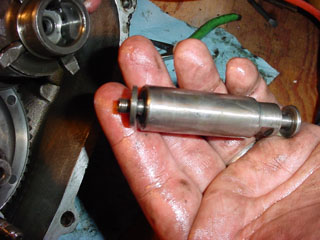
With all the gears off, pull the plunger to the extreme outer edge. This part is reverse threaded, so turn the flattened
part of the plunger with a 13 mm wrench in a clockwise motion (opposite to normal) to loosen it. Extract the plunger and its
spacer washer.
|
|
|
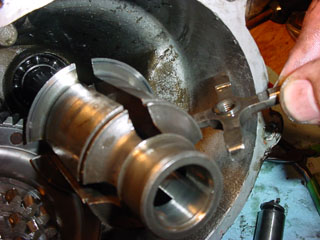
Extract the plunger and its spacer washer.
|
|
|
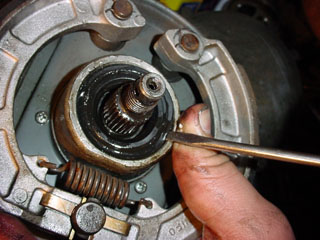
Turn the cruciform on its side and remove it from the axle housing.
|
|
|
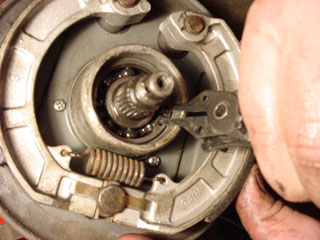
Now go to the hub side of the case and remove the hub seal.
|
|
|
Remove the circlip underneath.
|
|
|
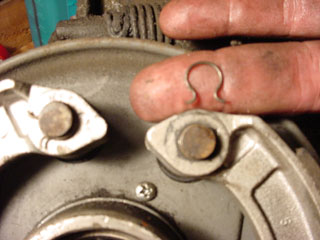
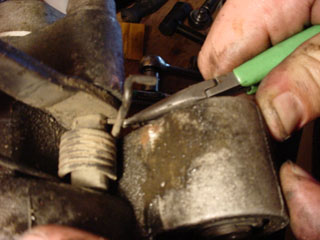
Remove both brake clips by hand or with a pair of pliers. They tend to go flying, so hold a rag over top of them.
|
|
|
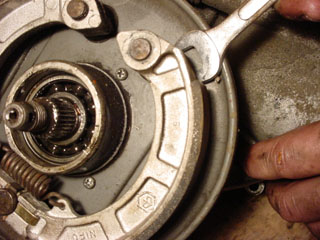
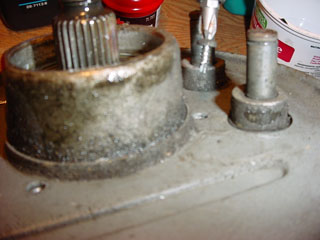
Lever the brake shoes off using a wrench and operating the brake cam. The brakes will eventually slide off the cams and collapse.
|
|
|
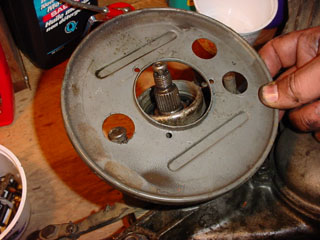
Unscrew the philips head screws and remove the backing plate.
|
|
|
Collect the backing plate. Underneath the plate are a few O-Ring style buffers, remove those as well.
|
|
|
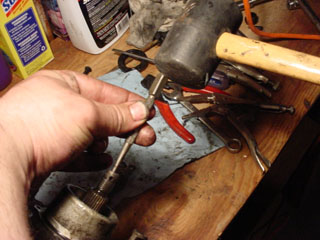
Now whack the holy crap out of the rear axle using a punch as shown. Do NOT just hit the axle itself, you risk
damaging the threads for the hub nut.
|
|
|
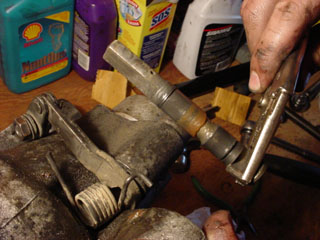
Once the rear axle comes out, put it aside and undo the cotter pin on the brake actuating cam.
|
|
|
Unhook the spring and pull the brake cam out of the engine case. Collect all the pieces you get.
|
|
|
Now back to the clutch where we left off earlier. With the flywheel side of the case removed,
you can get the crankshaft and the clutch out in a few taps of the hammer. Put a metal punch in the
hole on the crank arm and use a metal hammer to tap it out. Resist going mad with the hammer you don't want to
warp the crank. You'll usually be able to hear the relief of resistance on the bearing race as you hit it. If you're really
new at working on motors, a crank puller might be a better bet.
|
|
|
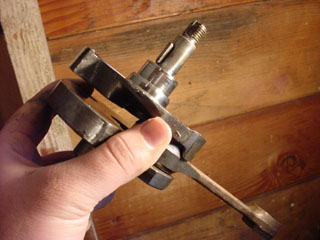
This is the crankshaft. There is a clutch side woodruff key to remove. Two very, very important parts will usually fall out.
One is the clutch spacer, the other is the clutch side seal. always replace this seal when going this far into the engine.
The clutch spacer goes between the clutch and the clutch side bearing. On injected motors, the spacer will have gearing on it.
|
|
|
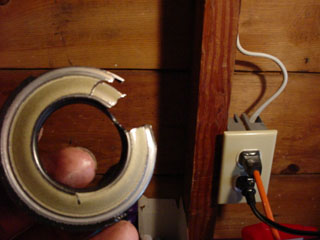
Here's the reason we did this project in the first place. This is an excellent example of a pretty catastrophic clutch side
seal failure. It appears the clutch side seal had taken a ride on the crank and bashed itself to pieces. We should have known by
the water-like oil that came out of the motor. Gas in the oil is a sure sign of a blown clutch side seal.
|
|
|
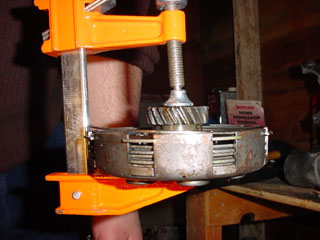
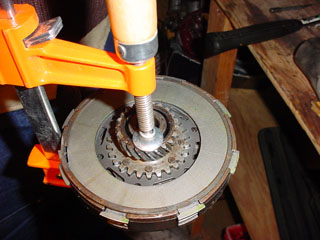
Compress the clutch by squeezing the top plate and the drive gear. We used a wood clamp to do our bidding, but a screw and
a few large washers is equally effective. While the clutch is compressed, remove the circlip by hand (you can see the circlip sticking
out of the clutch housing just below the drive gear in the picture).
|
|
|
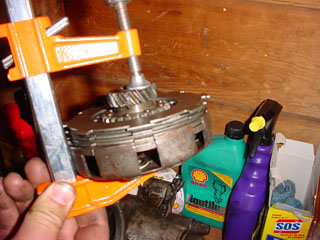
Another view of that pesky circlip.
|
|
|
Release the pressure of the compressor and all the plates will push out of the clutch body. Pull off all of the plates and
memorize the order. Always replace the friction and metal plates during a rebuild.
|
|
|
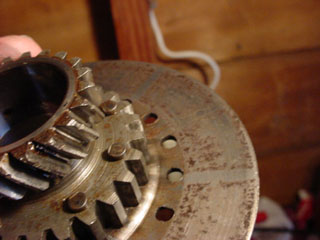
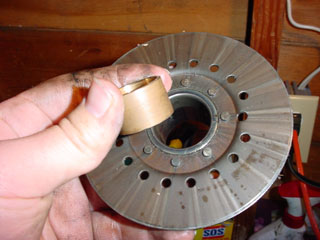
if you have gouges, rust, or loose rivets in your drive gear, it is best to replace the part.
|
|
|
Under the drive gear is a brass bushing and all of the springs and spring caps. Collect them all and store them. If the
caps and springs look okay, they may be reused. The brass bushing should always be replaced.
|
|
|
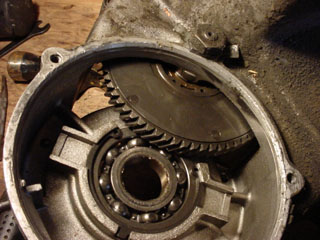
Go back to the motor, now, and loosen the tabbed washer holding on the 17mm nut. Then undo the nut with a socket wrench.
|
|
|
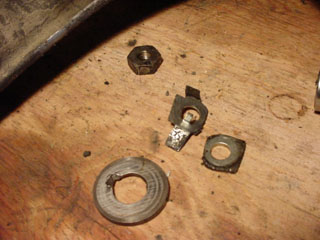
Here are the parts you'll get. A special weird ass washer (square washer), a tabbed washer and a 17mm nut. I've also included
a picture of that elusive clutch spacer (bottom center)
|
|
|
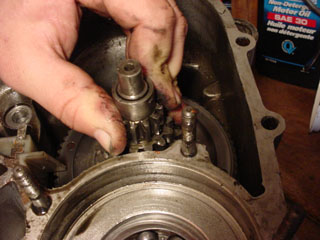
Flip the motor over carefully and slowly. Pull the layshaft a little and see if you can get it to budge. If not,
use a punch and gently drift it out a little. The reason for caution is there's a bunch of uncaged needle rollers
about to fall out.
|
|
|
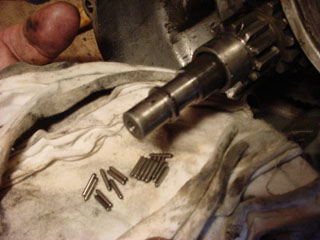
And here they are! There should be 21 of them (one is hiding in the picture). They are usually reusable, but on a high mileage engine, it might
be a good measure just to toss 'em out and get some more.
|
|
|
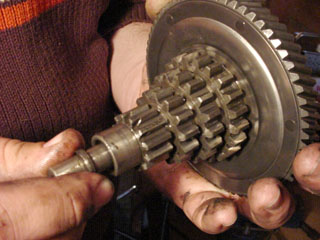
Now you can just pull the layshaft (primary/spring gear) out at your leisure. This is an example of a very nice layshaft.
No visible wear and the rivets are tight.
|
|
|
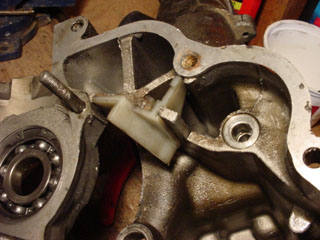
Pull the plastic oil wiper(s) from the case.
|
|
|
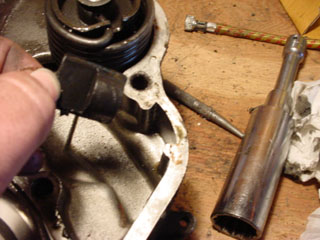
Pull the kickstart buffers from the case.
|
|
|
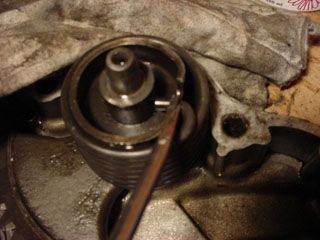
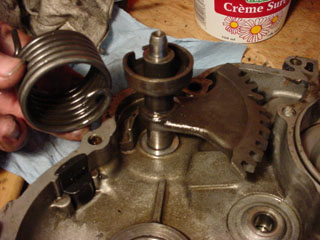
Push the kickstart spring back with a screwdriver, and pry it up and over the lip. The spring has a bit of tension, but it's not
going anywhere. Once the pressure is relieved and the spring is off of the kickstart crown, the lever shaft will pull right out.
|
|
|
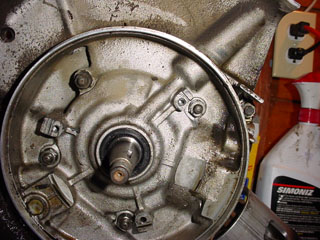
Here's the result.
|
|
|
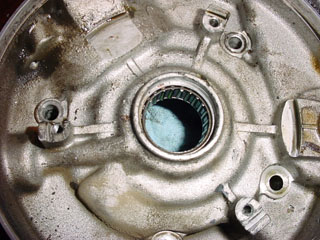
According to this picture the crank is still installed. :) No, we're just eyeing up that big old flywheel side seal.
See it? It's black and it's in the middle. We're gonna pry the piss out of it!
|
|
|
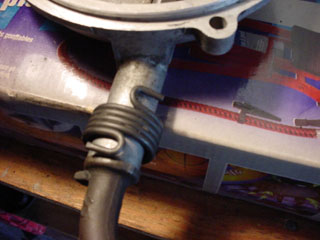
A job well done. See those bearings under there? Unless they're definitely fuct, like if the race is broken
or half the rollers are missing, it's kind of a bear to get out, so leave it alone. Bearings can go in the industrial
parts cleaner, too.
|
|
|
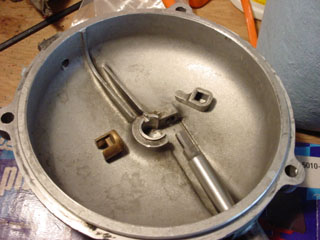
Pick up the clutch cover. Undo this spring, it's under a bit of tension, so watch your fingers.
|
|
|
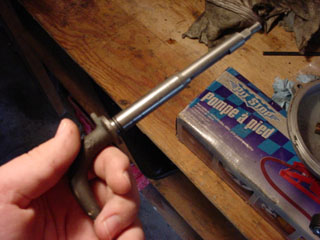
The spring hold the actuator arm in place as well as the push out actuator. The little brass bearing should have no cuts or
pitting in it (other than the oil gap that is cut through the middle), otherwise it's fit for the garbage.
|
|
|
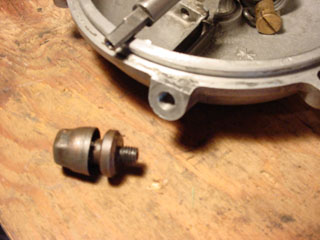
Here is the actuator arm in full. That little tiny O-ring should be replaced every time.
It is the cause of super-happy-fun oil leaks. A little O-ring grease will immensely increase its lifespan.
|
|
|
Unscrew the clutch cover breather and spray it with carb cleaner. Make sure there is a path for air to get through as this breather
helps to prolong engine seal life. It relieves the pressure of the gear box as the motor heats up. If you can't un-block it,
buy a new one.
|
Welp, that pretty much wraps it up for now. The next step would be to take out the bearings. I tend to like to take it to a shop
with the proper tools for that kind of stuff. The last thing you want to damage is a bearing or bearing race. However, The clutch
side bearing is held in by two circlips and case pressure. Undo both circlips, noting where they came from. Then you can bash
the crap out of it. Same goes for the hub bearing. The trick is getting the needle roller style bearings out without destroying
them. You need a special puller for them; however, you could destroy it and buy a new one (since you're probably
going to do that anyway). I find the kickstart area engine stud tends to rust like crazy. You should replace that every time as well.
If there is case damage like large cracks, you can either take it to a welder (who welds aluminum) or you can invest in
matched cases. When the cases are stripped, it might be a great idea to clean them. For about $20 you can put them in
a good ultrasonic parts washer at a machine shop, and for about $7 you can buy a huge can of engine degreaser and go at it with a wire brush
and a rag. Really go over every part looking for play, especially the crankshaft. Hold the crank webs in one hand and the con rod in another.
See what kind of play you can get. If the play is huge (like a joystick), or it makes grinding noises, you need a new big end bearing,
which is an expensive repair. You should also have your crank runout tested at a machine shop to make sure it's not warped, especially
if you don't know the history of the motor. Check for gouges and flecks of metal in the cases and find their source.
I wish you luck with tearing down your motor. Check other articles on the page for other stuff to do in the meantime :)
I'll have a full rebuild suite soon.